Tuesday, October 15, 2019

Liferay DXP Patching Tool

This Blog will help you to apply the Liferay Patch to Liferay Enterprise users. As we know that Liferay provides patching-tool utility to update the latest fix pack. Liferay Enterprise users by default they will have a Patching tool in the server. If it is not available then we can download from the Liferay Website. 
  1.  Download and Configure Patching Tool.
  • Download patching from Liferay Website.
  • Below is the folder structure inside the patching tool 
  • Change the below details in default.properties files.
            patching.mode=binary
               war.path=../tomcat-8.0.32/webapps/ROOT/
                 global.lib.path=../tomcat-8.0.32/lib/ext/
                    liferay.home=../
        • Inside the patches folder we need to copy the Patch file zip. Below i have two versions copied into my local pathches folder below is the screenshot.
        • After copying the Patching file Open the patching tool (liferay-dxp-digital-enterprise-7.0-sp6\patching-tool\) path in command prompt. 
        • In the above path, we have the files "patching-tool.bat" - for windows system and "patching-tool.sh"- for Linux or ubuntu system.
        • Below are the few commands which are available.
                   patching-tool info - This command is used to display the information about the patch available in your Liferay server and the version of the patching tool.
                     patching-tool auto-discovery - This command is used to auto-discover the Liferay Server based on your default.properties file.
                       patching-tool setup - This command is used to setup the patching.
                       patching-tool install- This command is used to install the patching.
            • First run "patching-tool setup" or   "./patching-tool.sh setup" for the setup of patch.
            • Then run "patching-tool install" or   "./patching-tool.sh install" to install the patch.
            • After installing the patch we can check the version of the patch by using the "patching-tool info" command.

            Thursday, August 8, 2019

            Retrieve field Value from Custom Document Type of Liferay

            The below code helps you to get the field values from the custom document type of Liferay.

            import com.liferay.portlet.documentlibrary.model.DLFileEntry;
            import com.liferay.portlet.documentlibrary.model.DLFileEntryMetadata;
            import com.liferay.portlet.documentlibrary.model.DLFileEntryType;
            import com.liferay.portlet.documentlibrary.model.DLFileVersion;
            import com.liferay.portlet.documentlibrary.model.DLFolder;
            import com.liferay.portlet.documentlibrary.model.DLFolderConstants;

                public static String getFieldValue(DLFileEntry fileEntry,String name){
                String feildValue = StringPool.BLANK;
                try {
                 DLFileEntryType dlFileEntryType = DLFileEntryTypeLocalServiceUtil.getFileEntryType(fileEntry.getFileEntryTypeId());
                 List ddmStructures = dlFileEntryType.getDDMStructures();
                 if(Validator.isNotNull(ddmStructures)){
              DDMStructure ddmStructure = ddmStructures.get(0);
                 
                   DLFileVersion dlFileVersion = fileEntry.getFileVersion();
                   DLFileEntryMetadata dlFileEntryMetadata = DLFileEntryMetadataLocalServiceUtil.getFileEntryMetadata(ddmStructure.getStructureId(), dlFileVersion.getFileVersionId());
                 
                   Fields fields = StorageEngineUtil.getFields(dlFileEntryMetadata.getDDMStorageId());
                   if(Validator.isNotNull(fields.get(name))){
                    feildValue= GetterUtil.getString(fields.get(name).getValue());
                   }
                 }
                } catch (PortalException | SystemException e) {
              _log.error(e.getMessage(), e);
                }
                return feildValue;
                }


            Monday, April 1, 2019

            Retrieve an Journal Article details with velocity in a template

             Below are the list of variables which we can use in template to retrieve the values of particular article

            $reserved-article-id.data
            $reserved-article-version.data
            $reserved-article-title.data
            $reserved-article-create-date.data
            $reserved-article-modified-date.data
            $reserved-article-display-date.data
            $reserved-article-author-id
            $reserved-article-author-name
            $reserved-article-author-email-address
            $reserved-article-author-comments
            $reserved-article-author-organization
            $reserved-article-author-location
            $reserved-article-author-job-title

            Example :-

            ${.vars['reserved-article-id'].data} :- It is used to read the article id which we are displaying in webcontent.

            Sunday, March 31, 2019

            Liferay Data Base Migration from 6.2 to 7.1

            Data Base Migration is critical task when we are doing the Liferay Upgradation project. Database comes first everywhere which you must require to migrate to make it compatible with the new version.
            This blog will help you details about the Data Base Upgradation.
            Note: Liferay 6.2 and Liferay 7.1 database version should be same , if it is not the same then first upgrade the database version then do the Liferay Database upgradation process.
            Steps for Data Migration :-
            • Once the database backup is done (Better Liferay Server is not up while taking a backup), we need to upgrade the database with respect to Liferay DXP. (We will use same backup if we face any issues while migrating database).
            • Disable indexing so that indexer doesn’t try to run during the upgrade.
              Add below .cfg file in following server path - [Liferay Home]/osgi/configs

              com.liferay.portal.search.configuration.IndexStatusManagerConfiguration.cfg with following content:- indexReadOnly=true.
              Note: By adding the above file you will avoid indexing and save time during the upgrade process. Once you have upgraded your portal, remove that property or set it to false so that you can index all objects from control panel.
            • Check the Liferay 7.1 server is down while doing the database migration.
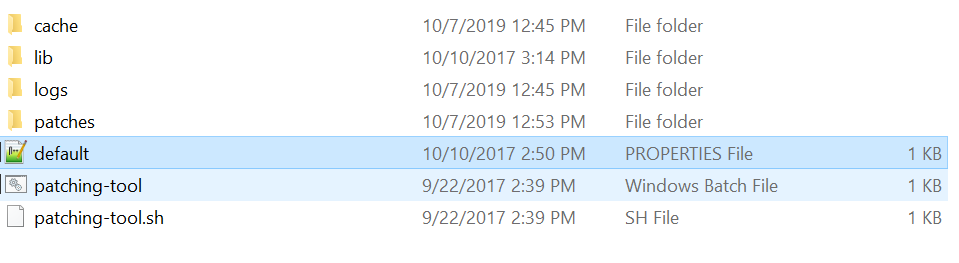
            • Open the directory:- liferay-dxp-7.1.10-ga1/tools/portal-tools-db-upgrade-client/

            • Open the app-server.properties file.
            • Edit the following properties under the Tomcat section to uncomment them
            1.    dir=../../tomcat-9.0.6
            2.    extra.lib.dirs=/bin
            3.    global.lib.dir=/lib
            4.    portal.dir=/webapps/ROOT
            5.    server.detector.server.id=tomcat
            • Open the portal-upgrade-database.properties in the same directory as portal-tools-db-upgrade-client
            • Edit the following properties under the MySQL section to point to the "inthiyaz7.1"database (I have created database schema as "inthiyaz7.1" ).
            1.   jdbc.default.driverClassName=com.mysql.jdbc.Driver
            2.   jdbc.default.url=jdbc:mysql://localhost/lportal?characterEncoding=UTF-8&dontTrackOpenResources=true&holdResultsOpenOverStatementClose=true&useFastDateParsing=false&useUnicode=true
            3.   jdbc.default.username=root
            4.   jdbc.default.password=password
            ·         Make sure added username and password is right.
            • Open the portal-upgrade-ext.properties in same directory.
            ·         Edit the below property to uncomment
            ·          liferay.home=../../
            ·         Run the following command to start the database upgrade client.
            ·         ./db_upgrade.sh

            The database upgrade client will first bootstrap the OSGi container. You will see something like the following in the logs:
            ```
            ${TIMESTAMP} INFO  [Start Level: Equinox Container: ${CONTAINER.ID}][BundleStartStopLogger:35] STARTED ${OSGI.BUNDLE.NAME} [${OSGI.BUNDLE.ID}]
            ```
            • After the OSGi container successfully started, the database upgrade client detects the previous Liferay version info in the database in the Release_ table. If a previous version of Liferay is detected, then the database upgrade client automatically runs the core data upgrade process. You should see something like the following in the log:
            ·           ${TIMESTAMP} INFO  [main][UpgradeProcess:86] Upgrading com.liferay.portal.upgrade.UpgradeProcess_7_0_0
            ·           ${TIMESTAMP} INFO  [main][UpgradeProcess:86] Upgrading com.liferay.portal.upgrade.v7_0_0.UpgradeSchema
            • After the core data upgrade process is finished, the verification process will kick off.
            ·           ...
            ·           ${TIMESTAMP} INFO  [main][UpgradeProcess:103] Completed upgrade process com.liferay.portal.upgrade.PortalUpgradeProcess in xxxms]
            ·           ...
            ·           ${TIMESTAMP} INFO  [main][VerifyProcess:66] Verifying com.liferay.portal.verify.VerifyProcessSuite
            ·           ...
            ·           ${TIMESTAMP} INFO  [main][VerifyProcess:81] Completed verification process com.liferay.portal.verify.VerifyProcessSuite in xxxms
            • If the upgrade tool’s autoUpgrade property is set to “true” (which is the default setting), the upgrade process automatically runs the upgrade process for all the modules. You will see something like the following in the log (use the com.liferay.calendar.web module as an example):
            ·           ${TIMESTAMP} INFO  [main][UpgradeProcess:86] Upgrading com.liferay.calendar.web.internal.upgrade.v1_0_0.UpgradePortletId
            • If no exception occurred, the update progress is completed with the following message:
            ·           Completed Liferay core upgrade and verify processes in 178 seconds
            ·           Checking to see if all upgrades have completed... done.
            Note :- However, the message above does not guarantee you have a successful upgrade. Always check the entire upgrade log to see if there are any exceptions that came up during the upgrade. If there are no exceptions, then the upgrade process is successfully finished. For this exercise, there should not be any exceptions.


            Liferay DXP JNDI Data Source Cofiguration

             This Blog will help us to learn about the JNDI Data Source Configuration in Liferay DXP. We have tested this with Liferay 7.3 with Tomcat. ...